Develop Your Addon Based On Odoo 12
💡 This post is insightful for the following scenarios.
- Odoo Addon Customization
- Develop Odoo Addon
Background
I have already installed odoo 12 successfully on my Ubuntu 20.04, so the next step is to develop my personal addon module.
Step
0. Preparation
1. Clone your code or create your develop folder
2. Update your .odoorc file
Add your code folder into odoo configuration location and use “,” as separator.
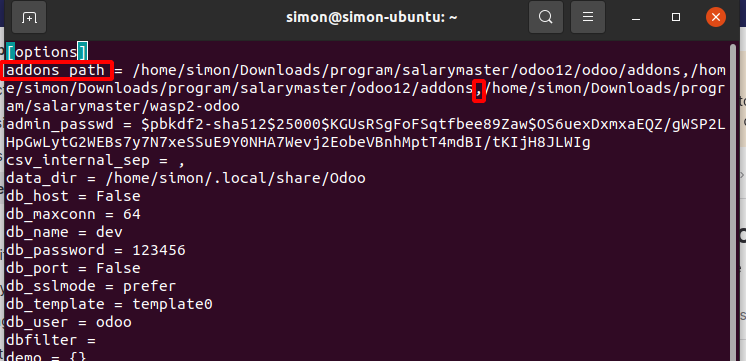
If you check the link from Preparation carefully, you will know where .odoorc is.
If you decide to write your addon from scratch, you don’t need to follow the rest of this post. You can just write your code on the folder you just created.
The rest of this post is for the people who want to use their previous code as foundation.
3. Add your database (Optional)
If you already developed your addon before and had your database, you should move it from your original computer to your new compute.
Go to the odoo database manager
1 | http://localhost:8069/web/database/manager |
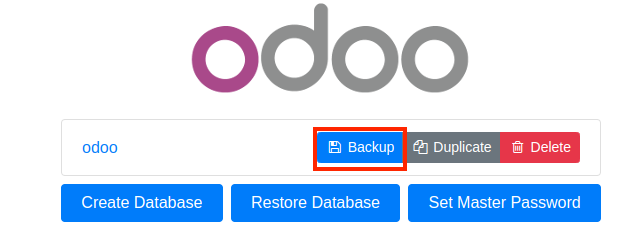
Export your database
Backup your database and save the .zip file.
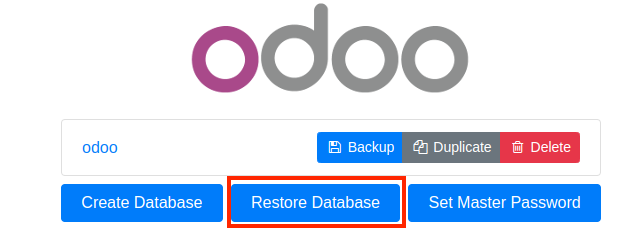
Import your database
Restore your database from downloaded .zip file
Input the master password you set up before, chooes the .zip file and set up a new name.
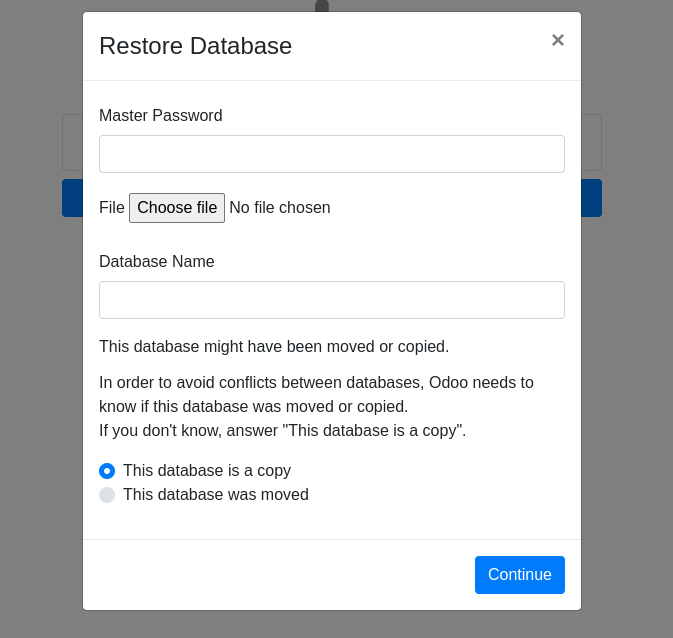
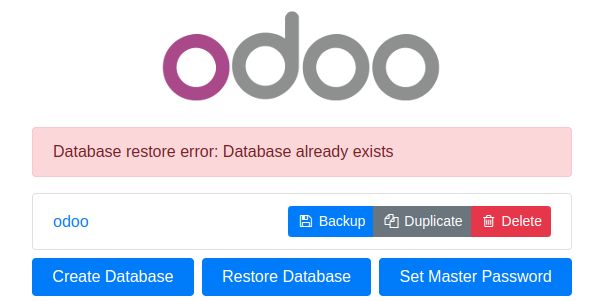
When it finishes, you may not find the database you just imported.

Do not need to be panic, if you import again, it will show up this alert.
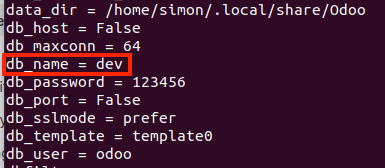
4. Update your .odoorc file (Optional)
What you need to do is to update your database name in odoo configuration file.
5. Initialize your database (Optional)
In this time, when you run odoo, it may ask you to initial your database. You can run this command to initialize your database.
1 | ./odoo-bin -i base |
6. Update all the addon module (Optional)
Run the following code to update all your addon module, it may take a while.
1 | ./odoo-bin -u all |